Extracting bootstrap studio form data automatically using App Script - A case study.
Smart forms in Bootstrap Studio empower you to effortlessly create dynamic forms without the need for backend development. When users fill out and submit these forms, the data seamlessly lands in your inbox. While this approach offers convenience, it's crucial to be aware of its limitations:
Limited Database Interaction: Without a server or database, the challenge arises when attempting to store and analyze submitted data for future reference. Form data, in this scenario, remains transient and is solely managed on the client side.
Absence of Persistence: The lack of a backend means there is no centralized storage for form submissions. This absence becomes especially significant if you aim to maintain a comprehensive record of submissions over time, highlighting the necessity of a backend with a database.
The objective of this case study was to explore the feasibility of leveraging Google Apps Script to seamlessly gather form responses submitted to Gmail through a Bootstrap Studio smart form and store the data in a Google Spreadsheet , effectively transforming it into a database. The envisioned script needed to be capable of executing either at specified time intervals or in response to user triggers, dynamically collecting submitted data into the spreadsheet whenever new form submissions arrived.
To execute this task, the following steps were taken:
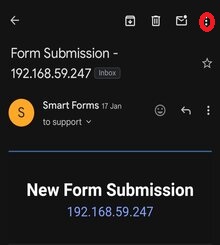
Form Submission: I initiated the process by submitting a smart form. The specific form utilized for this experiment is accessible here. Additionally, a visual representation of the form is provided below for reference. Note: The form has 5 input fields.
Secondly, in my Gmail inbox, I applied a new label named 'database' to my smart form email. All subsequent form submissions were automatically tagged with this label. To apply this label on mobile, open the email, tap the ellipsis icon, choose 'Change labels,' and assign the label. Alternatively, on desktop, click the '+' icon next to 'Label' at the bottom left of your inbox to create a new label, then apply it to your smart form emails.
On mobile
Depending on the number of fields in the form, I set up a new Google Sheet (ensure you are signed into your Google account). Title it according to your preference and set the heading labels for your sheets based on the input name fields/placeholders of your smart form. Like seen below:
In Bootstrap Studio, when you select any field input of your smart form in the Overview panel or on the Stage, navigate to the Options tab under the Options panel. There, you'll be able to set the 'Name' attribute for each input field. Utilizing these 'Name' attributes allows you to conveniently extract form data from incoming emails or Gmail messages directly into your sheet. For better visualization, see below:
While setting the 'Name' attribute facilitates data extraction, it's also beneficial to examine the structure of the sent smart form email. To do so, open the email from the smart form on your desktop or laptop. With the email open, click the ellipsis (three dots) located at the top right corner of the email window. From there, navigate to 'Show Original' to view the raw email source, as illustrated below.
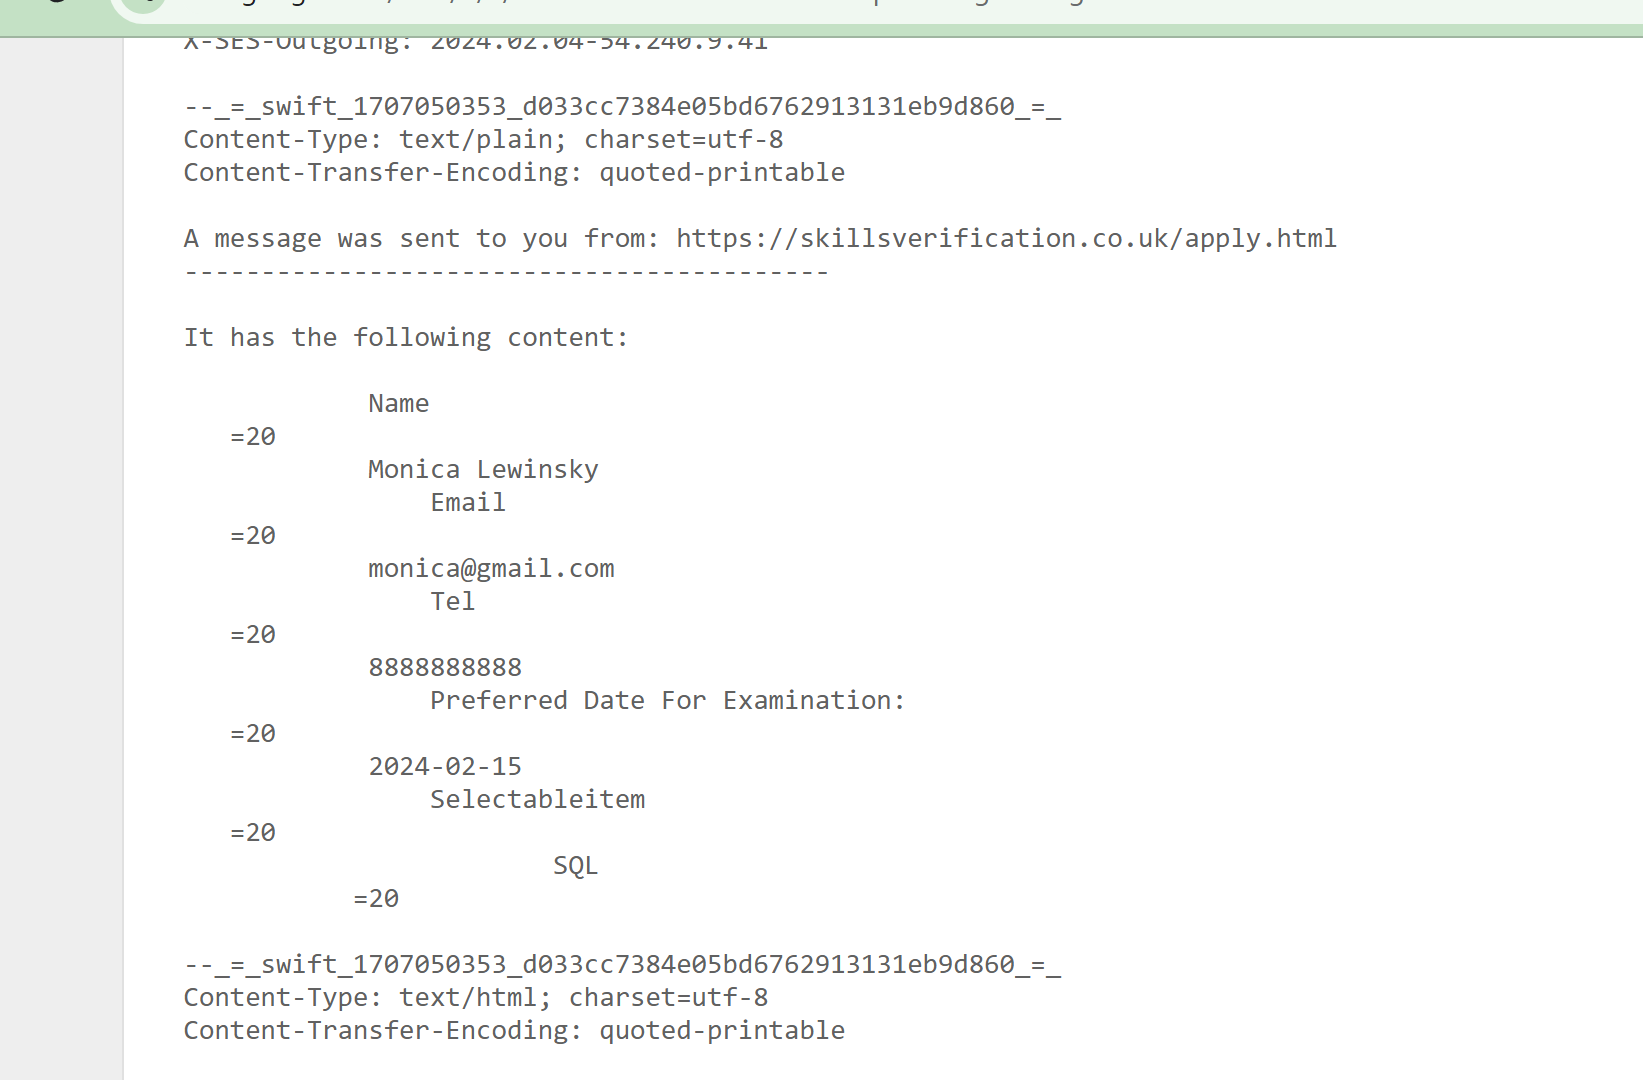
Next, locate the section of your email structure that corresponds to the image below. Within this section, you should find the form data, including both the labels and the responses submitted by the form's respondents.
In the image below, red-boxed items like 'Name', 'Email', 'Tel', etc., denote the 'Name' attributes configured in Bootstrap Studio. If unspecified, Bootstrap Studio's label/placeholder values are used. The image shows that the respondent's name, 'Monica Lewinsky', lies between 'Name' and 'Email', making 'Name' the startMarker and 'Email' the endMarker for extracting the name. Following the same logic, 'Email' is the startMarker and 'Tel' is the endMarker for the email address 'monica@gmail.com'. This approach is consistent across all inputs. Notably, the endMarker for the last input is the green-boxed boundary identifier in the image.
Open your newly created Google Spreadsheet, go to Extensions > Apps Script, and open the Script Editor. Before pasting the provided code, ensure that you clear any existing code. Optionally, you can rename the project from 'Untitled Project' to a custom name of your choosing
// Function to get processed message IDs from script properties
function getProcessedMessageIds() {
  var scriptProperties = PropertiesService.getScriptProperties();
  var idsString = scriptProperties.getProperty('processedMessageIds') || '';
  return idsString.split(',');
}

// Function to mark a message as processed and update script properties
function markMessageAsProcessed(messageId) {
  var scriptProperties = PropertiesService.getScriptProperties();
  var processedMessageIds = getProcessedMessageIds();

  // Add the current messageId to the list
  processedMessageIds.push(messageId);

  // Update script properties
  scriptProperties.setProperty('processedMessageIds', processedMessageIds.join(','));
}

// Function to extract field value from the email body
function extractField(emailBody, startMarker, endMarker) {
  // Find the position of the start marker in the email body
  var startIndex = emailBody.indexOf(startMarker);

  if (startIndex !== -1) {
    // Adjust the start position to skip the start marker and new lines
    startIndex = startIndex + startMarker.length;

    // Find the position of the end marker starting from the adjusted start position
    var endIndex = emailBody.indexOf(endMarker, startIndex);

    // If end marker is not found, extract until the end of the email body
    endIndex = endIndex !== -1 ? endIndex : emailBody.length;

    // Extract and trim the field value
    var fieldValue = emailBody.substring(startIndex, endIndex).trim();

    return fieldValue;
  }

  return '';
}

// Function to write data to the Google Sheet
function writeToSheet(sheet, data) {
  // Append data below the headers
  sheet.appendRow(data);
}

// Main function to process new database emails
function processNewDatabaseEmails() {
  // Access the 'database' labeled emails
  var threads = GmailApp.search('label:database');

  // Access the target Google Sheet
  var sheet = SpreadsheetApp.openById('1Fbk8KLD19fJpK0iH1YJdzKy9BEP-OrZVC-IWrUPEb6N').getActiveSheet();

  // Get the IDs of the processed messages from script properties
  var processedMessageIds = getProcessedMessageIds();

  // Log the processed message IDs
  Logger.log('Processed Message IDs: ' + processedMessageIds.join(', '));

  // Loop through each email thread
  for (var i = 0; i < threads.length; i++) {
    var messages = threads[i].getMessages();

    // Loop through each message in the thread
    for (var j = 0; j < messages.length; j++) {
      var message = messages[j];
      var messageId = message.getId();

      // Check if the message has already been processed
      if (!processedMessageIds.includes(messageId)) {
        // Extract 'Name' and 'Email' from the email body
        var emailBody = message.getPlainBody();
        var name = extractField(emailBody, 'Name', 'Email');
        var email = extractField(emailBody, 'Email', 'Tel');
        var tel = extractField(emailBody, 'Tel', 'Preferred Date For Examination:');
        var preferredDate = extractField(emailBody, 'Preferred Date For Examination:', 'Selectableitem');
        var selectableItem = extractField(emailBody, 'Selectableitem', '--_=_swift_1706190119_9e755c648c2c4ee4339bfdc8cf9bf0b8_=_');

        // Log extracted data
        Logger.log("Extracted Data - Name: " + name + ", Email: " + email + ", Tel: " + tel + ", Preferred Date: " + preferredDate + ", Selectable Item: " + selectableItem);

        // Write data to the Google Sheet
        writeToSheet(sheet, [name, email, tel, preferredDate, selectableItem]);

        // Mark the message as processed
        markMessageAsProcessed(messageId);

        // Log after marking as processed
        Logger.log("Message Marked as Processed - Message ID: " + messageId);
      }
    }
  }
}

  Copy Code
After pasting the code in your Script editor, you need to implement these changes.
In the processedNewDatabaseEmails() fucntion, change the 'database' to the label name you assigned to your smart form in your inbox, also change the sheet ID, to your own sheet's ID.
  // Access the 'database' labeled emails
  var threads = GmailApp.search('label:database');

  // Access the target Google Sheet
  var sheet = SpreadsheetApp.openById('1Fbk8KLD19fJpK0iH1YJdzKy9BEP-OrZVC-IWrUPEb6N').getActiveSheet();
Find your sheet ID in the URL of your opened spreadsheet—it's the alphanumeric sequence between '/d/' and '/edit'. Use this ID to replace 'your_SPREADSHEET_ID' in this part of the code.
The major part of the code that needs changing is the if statement in the same processNewDatabaseEmails() function, Note that aside the 'emailBody' variable that retrieves the plain text content of the email body for further processing, the five other variables (name, email, tel, etc) correspond to the five input fields on this form. Remember that the startMaker and endMakers for the name, was earlier established to be 'Name', and 'Email', respectively. The part to change in the code is the startMaker and endMakers for these variables such that they correspond with the names you assigned in your email structure as demonstrated here. Each variable's startMarker and endMarker are the second and third arguments passed to the extractField() function. Ensure that the number of variables matches the number of input fields in your form.
  var emailBody = message.getPlainBody();
        var name = extractField(emailBody, 'Name', 'Email');
        var email = extractField(emailBody, 'Email', 'Tel');
        var tel = extractField(emailBody, 'Tel', 'Preferred Date For Examination:');
        var preferredDate = extractField(emailBody, 'Preferred Date For Examination:', 'Selectableitem');
        var selectableItem = extractField(emailBody, 'Selectableitem', '--_=_swift_1706190119_9e755c648c2c4ee4339bfdc8cf9bf0b8_=_');
Additionally, update the writeToSheet() function called within processNewDatabaseEmails() to accurately populate the form data in your spreadsheet. Verify that the variable names and their count are correctly modified in the provided code snippet.
// Write data to the Google Sheet
     writeToSheet(sheet, [name, email, tel, preferredDate, selectableItem]);
Also, modify the Logger.log() calls to reflect the form data. This step is crucial for troubleshooting if issues arise. Ensure that the Logger.log() statements match the number and names of the variables you're using.
  // Log extracted data
        Logger.log("Extracted Data - Name: " + name + ", Email: " + email + ", Tel: " + tel + ", Preferred Date: " + preferredDate + ", Selectable Item: " + selectableItem);
Save your script, then in the Script Editor, go to Triggers (the clock-like icon two levels below the editor on the left). Set the function to run as 'processNewDatabaseEmails', choose 'Head' for deployment, and 'Time Driven' as the event source. Configure the other fields as per your preference. Remember, the script will only collect data once per form; running it again won't duplicate entries. To execute the script manually, select 'processNewDatabaseEmails' and click 'Run' in the Script Editor interface.
Although the setup process may require an hour or more, the exact duration depends on the person performing the setup. Once completed, regardless of the time invested, your smart form database issue will be resolved.
Note: The code is yet to be tested for forms with file inputs